Wednesday, December 12, 2012

Wax Paper Capiz Shell Chandelier


Step 1: Find a base. I used a wreath base and 
reconstructed it so it would fit around the light. 

You could also use a lamp shade or a hanging basket


Step 2: Take two boxes of wax paper and cut into equal lengths.
 I made them the length of my ironing board to make step 3 easier.


Step 3: Lay three sheets together and iron them together. 


 Step 4: Trifold the wax paper and punch out circles 
(You can use any size punch you want, but I used a 1 3/8 inch)


Using the punch upside-down makes it easier to see where you are punching. 


Step 5: Sew circles together. 


Step 6: Glue to base.


Step 7: Hang over light. 

(I made mine so it would fit right over the dome that was already there.
 Make sure you hang it far enough away from the light bulb. Waxpaper will melt)


Friday, November 2, 2012

Table Setting for the Holidays

With the Holidays coming up you may be hosting a large party or just having a family meal here is a few examples of proper place settings.


More examples of how to set the table.


Here are some fun ways to decorate that table!


Dress up a plain vase with inexpensive items.


Or find some fun ways to fold napkins.

Wednesday, August 29, 2012

Simple Headboards

Here is a way to make a simple headboard.


Step 1: Take an old door or panel(s) of wood. Remove all hardware.


Step 2: Staple, nail or tack foam and fabric around the entire door or panel.


Step 3: Attach hanging hardware.


Step 4: Hang, as desired, on the wall behind the bed.


Similar video instruction
Do it in panels
Do it with curves


Monday, July 30, 2012

Planters

Planters can be expensive and predictable, but here I will show you 8 ways to create an original planter for little to no cost.


1. Pallet Planter


2. Concrete Planter


3. Lightbulb Planter


 4. Log Planter


5. Book Planter


6. Boot Planter


7. Block Planter


8. Can Planter


Thursday, July 5, 2012

Refurbish an old chest


I was up in our attic going through old boxes and totes when I came across this old rundown chest. I've had it for many years, but never realized it's potential. Then I had an idea.


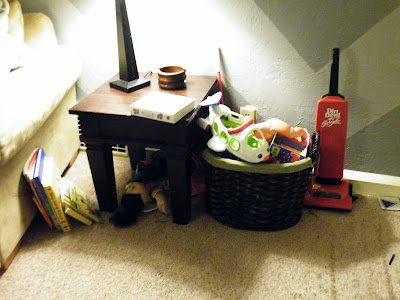
See all these toys causing a scene in my newly decorated living room?  I decided they would be the heart of my new project.


How to refurbish an old chest.


Step 1: Paint or stain the wood.


Step 2: Reupholster the cushion. 

First, you will need to attach your fabric, inside out, to the back edge of your cushion.


Like so:


Then flip the fabric up and over the top of the cushion (right side up).


Like so:


Then wrap your fabric tightly around all three edges and staple in place. 


There you have it! 


Storage for al those unsightly toys.