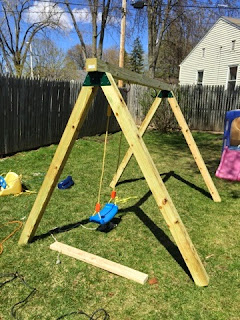
Supplies:
2- 4x4x12' pretreated wood beams cut in half so - 4 4x4x6' beams
(I made a toddler swing set - for regular size use 4x4x8' beams)
1- 4x4x8' pretreated wood beam
1- 2x4x8' pretreated wood beam
40 - 2" wood screws
4 - 3" wood screws

Step 1: Attach braces to 6' beams
Lay out 6' beams and aline the brace at the top...
Screw into place...
Flip over and do the same to the other side.
Step 2: Create side supports
Measure 2x4x8' beam for side supports...
Cut beams to the same size.
Step 3: Attach upper beam.
If working alone, flip a-frame over and attach upper beam upside-down.
Step 4: Attach swings
I found it easier to attach swings before standing it up.
(this is for shorties)
Step 5: Attach side beam
(use a level if you want it straight - I clearly don't care :)
Use 3" screws to attach on either end.
And Done.

I will be painting it too... picture to come!

Side note: you will want to add 2 of these
braces for extra strength... I will be doing this soon!


